

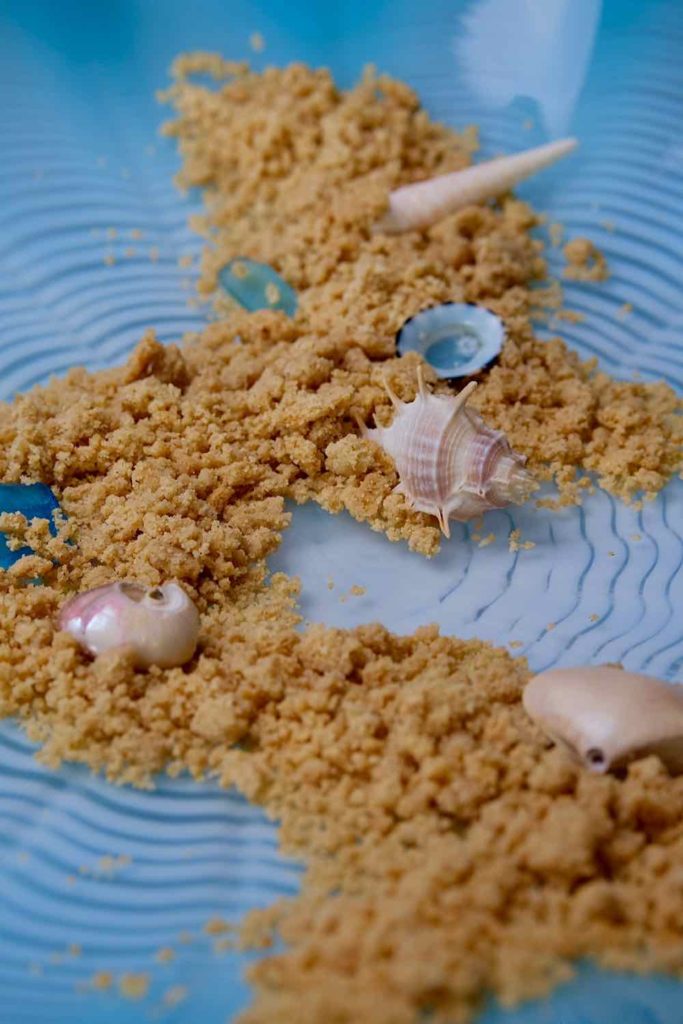
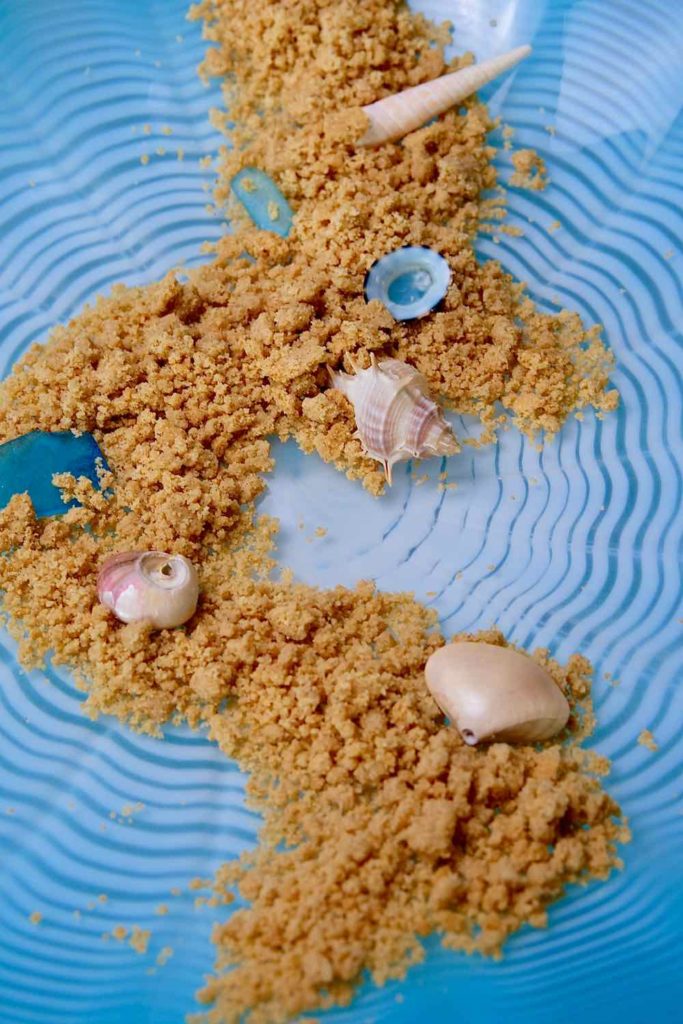
How To Make Sand For Cake Decorating
My recipe for Edible Sand is a buttery, crunchy cookie topping for puddings, ice cream and yogurt. I use it to create layers of texture in parfaits as well as decorating cakes. And because this sand is made from oat flour, it is gluten-free.
It's so easy….really!
This simple topping is a delicious way to add a flavorful and buttery texture to any dish. Not only is edible sand easy to make. It can be ready to use in 20 minutes or less. In just a few minutes, you can have crunchy salty, sweet crumbles ready to top your dessert.

Two different techniques..
This recipe allows you to choose from two different techniques. First of all, the easiest technique is creaming softened butter with sugar. This preparation results in a delicious sand that is slightly blonder in color and with the flavor of graham cracker. However if time allows, you may like to try this second technique. The second technique requires melting and browning the butter. Browning the butter allows the development of a deep nutty and buttery flavor. Furthermore, the color slightly deepens producing a darker golden hue to the sand. The sand below was made with browned butter.
So many uses
There are numerous applications for this sand. Of course, the most obvious is a topping for ice cream, puddings and yogurt. But don't forget, this topping will easily turn pudding or ice cream into a parfait. Parfaits are crowd pleasers with their pretty layers of color. And the only limit is your imagination. For a pretty summertime treat consider making this colorful Red, White and Blueberry Parfait. And for a milk-free, gluten-free option it can be made with my recipe for Vanilla Pudding made from Almond Milk.
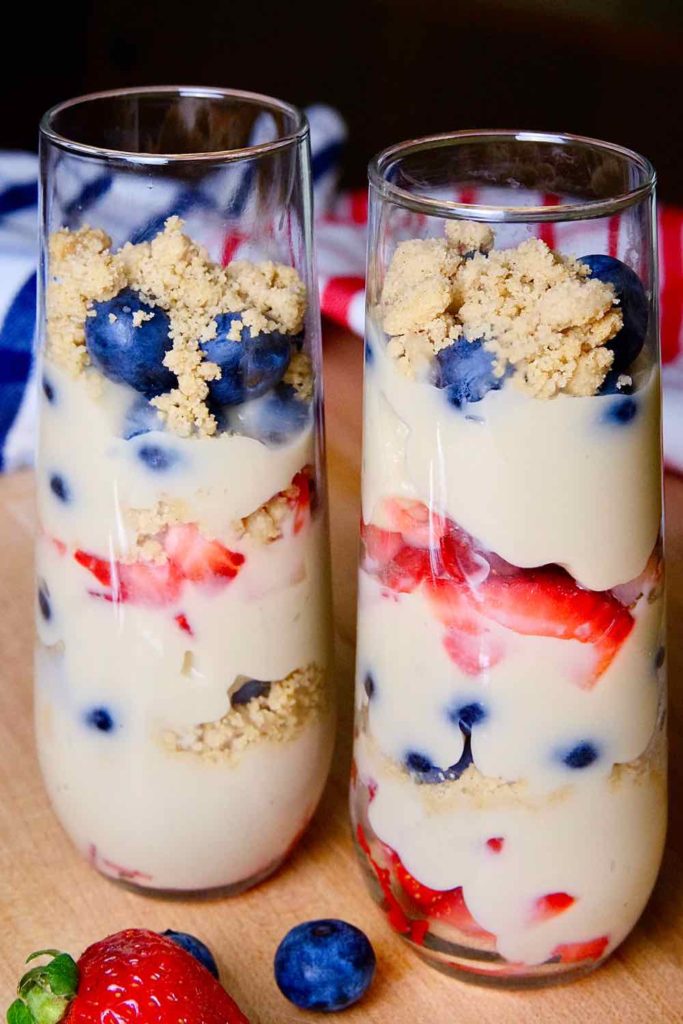
Or perhaps for fall create a parfait made by layering Vanilla Pudding, Edible Sand and Sauteed Cinnamon Apples. A special occasion may call for a Tuxedo Parfait. This may be created by layering Chocolate Sand with Vanilla Pudding and edible (white) sand with Chocolate Pudding. Another advantage of these desserts are they are all gluten-free and dairy free. As well as weight watcher and waist watcher friendly!
In addition to parfaits, consider using edible sand for decorating cakes, cupcakes and cookies, too! Or how about using this topping on quick breads like banana bread and muffins. For use in this application, cook the sand only once. After the first bake, break up the cookie and set aside to cool. This will keep the sand coarser in texture and also protect the topping from becoming over-baked.
WEIGHT WATCHERS AND WAIST WATCHERS
1 Tablespoon of Edible (white) Sand is 2 WW Smart Points or 45 calories.
Buon Appetito!
Easy Edible Sand
This buttery crunchy cookie topping has the appearance and feel of sand. And because it is made from oat flour it is gluten-free. Great to created parfaits or as a topping on your favorite pudding, ice cream or yogurt. This crunchy sand also can be used to decorate cakes, cupcakes and cookies.
- Prep Time: 5 minutes
- Cook Time: 15
- Total Time: 20 minutes
- Yield: 23 Tablespoons 1x
- Category: Dessert
- Method: Bake
- Cuisine: American
- 53 grams Butter, softened (2 ounces)
- 54 grams Granulated Sugar (1/4 cup)
- 3/4 teaspoon Vanilla Extract
- 94 grams Oat Flour (3/4 cup plus 2 Tablespoons)
- 2 grams Kosher Salt (1/2 teaspoon)
- This dough can be made using two different techniques, resulting in different flavor.
- The first technique is simply by creaming the butter with the sugar before adding the remaining ingredients.
- The second technique is by browning the butter first. Browning the butter deepens the flavor of the butter with a slightly nuttiness and actually intensifies the butter flavor. In order to brown the butter, melt the butter in a small saucepan over medium heat. As the butter melts, swirl the butter around occasionally by gently moving the pan in a circular motion. Continue with this for several minutes, until the butter starts to develop a golden brown color. Once you see the butter beginning to turn color, immediately remove the pan from the heat and let cool. Once the butter has cooled, proceed with making the dough by adding the sugar in step 2.
FOR THE DOUGH:
- Preheat oven to 325 degrees.
- In a bowl, using a mixer, beat the butter and sugar on medium-high speed until light and fluffy, about 3 to 4 minutes.
- Reduce the speed to low and add the vanilla.
- In a small bowl, combine the oat flour and salt.
- Add the flour mixture in three increments, and combine with the mixer on low speed. Stop the mixer in between each addition of flour and scrape down the sides.
- Mix until the dough comes together in a ball. (The dough may be refrigerated for a week or frozen for up to 2 months.)
- Using two pieces of parchment paper, roll the dough to about 1/4 inch in thickness. This dough is very dense and will require a rolling pin to help spread it out.
- Place on a rimmed baking sheet and remove the top piece of paper.
- Bake in oven at 325 degrees for 8 minutes.
- Remove from the oven and rack with a fork to break dough into medium clumps.
- Place back in the oven and bake for 7 minutes more.
- Remove from the oven and rake again to create smaller grains of sand. **
- Cool and store in an air tight container for up to two weeks or freeze for up to 2 months.
Notes
**You are in control of how fine you would like to create your sand. If you desire a clumpier sand that has the appearance more like wet sand. Rake less on the final raking. However, if a fine dry sand is desired, use the fork to mash and press out the clumps. This will break them up and make the grains finer. It is much easier to break up the clumps while the sand is warm.
1 Tablespoon of Edible Sand is 2 WW Smart Points or 45 calories.
Nutrition
- Serving Size: 1 Tablespoon
Keywords: Edible Sand, Ice Cream Topping, Pudding Topping, Parfaits, Easy Desserts, Crunchy Cookie Toppings, Decorating Sand, Streusel Topping
How To Make Sand For Cake Decorating
Source: https://www.miascucina.com/easy-edible-sand/
Posted by: taylorwashound.blogspot.com
0 Response to "How To Make Sand For Cake Decorating"
Post a Comment